
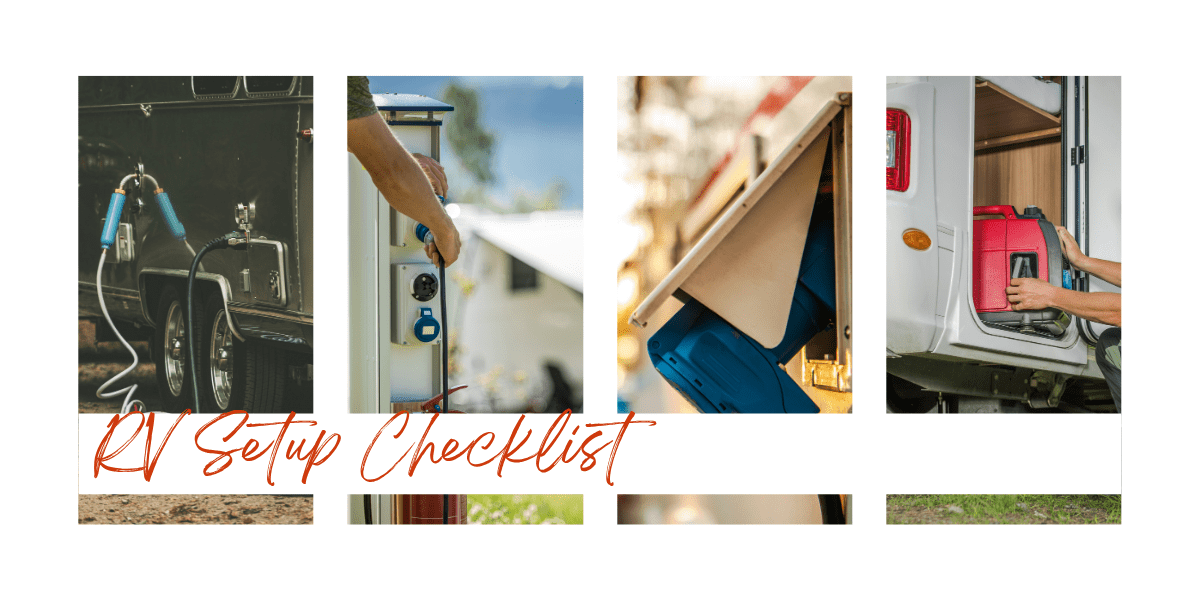
The Ultimate RV Setup Checklist For Campsites In The Rockies
Pulling into a mountain campground after hours on the highway is one of those moments that can go sideways fast. You’re tired, the kids are restless, the dog needs out, and then you find the site you reserved is just a narrow gravel pad wedged between towering pines on a noticeable slope.
Every camper at the neighboring sites seems to pause and watch as you start backing in. It’s not your imagination. They really are watching.
A reliable RV setup checklist, followed in the exact same order every single time, is what separates a smooth 20-minute arrival from a frustrating hour. This camping checklist helps prevent second-guessing and muffled arguments through the truck window.
This is especially true in the Canadian Rockies, where campground pads in places like Banff, Jasper, and Kananaskis are rarely flat, often tight, and almost always surrounded by things you really don’t want to hit.
This guide walks you through a strict, step-by-step campsite setup checklist built specifically for mountain campgrounds. It covers positioning, leveling, chocking, unhitching, stabilizing, and hooking up utilities in the right order.
Every step is grounded in the realities of Rockies camping: sloped pads, low branches, older infrastructure, and the kind of variable conditions that generic checklists just never mention. If you want more mountain-specific planning resources, Along The Rockies covers everything from campground reviews to printable RV checklists designed for this region.
Key Takeaways
- Following a fixed setup order prevents RV damage, saves time, and keeps campsite arrivals calm on tight mountain pads.
- Leveling side-to-side before unhitching is the single most important step beginners skip, and it protects your RV refrigerator and cooling unit from costly damage.
- Connecting utilities in the correct sequence, including using a surge protector and water pressure regulator, protects your rig from electrical and plumbing problems. Keeping a comprehensive RV essentials checklist means you never forget these critical items.
The Stress-Free Rockies Campground Arrival
A good arrival starts before you even put the truck in reverse. Knowing exactly what to do, and in what order, keeps everything calm and controlled on a busy mountain site.
Check-In, Site Rules, And Hookup Confirmation
When you pull into the campground, stop at the registration kiosk or gatehouse first. Confirm your site number, check-in and check-out times, and quiet hours.
Ask about any site-specific rules, especially generator restrictions that are common in national parks like Jasper and Banff.
Before you drive to your pad, confirm what hookups your site actually has. Full-hookup sites with power, water, and sewer are not the norm in most Rockies provincial and national park campgrounds.
Many sites are partial hookup (power and water only) or even dry camping. Knowing this before you pull in saves you from confusion later.
If the campground map is available at check-in, take a look at your site’s orientation. Note which side the hookups are on—this tells you which direction to back in so your utility panel faces the right way.
Why A Fixed Setup Order Matters On Busy Mountain Sites
Here’s the thing about Rockies campgrounds: the pads are often short, sloped, and tucked under mature trees. There’s very little room for error, and almost no room to reposition once you start setting up.
If you level before checking clearances, you might extend a slide-out into a tree. If you unhitch before leveling side-to-side, you lose the ability to easily reposition the trailer.
If you connect power before using a surge protector, a faulty pedestal could damage your electrical system. Every step depends on the one before it.
When you follow your RV setup and teardown checklist in a strict, repeatable order, you won’t have to undo work. This systematic travel trailer setup approach prevents damage and helps you keep your patience.
Write the sequence down, laminate it, and keep it in the truck. After a few trips, it just becomes second nature.
Step 1: Positioning And Clearance Checks
Before you do anything else, scout the site on foot. Walk the entire pad and identify every obstacle, hookup point, and clearance issue before you back in.
This two-minute walk saves you from the most common and most expensive setup mistakes. It’s really worth the tiny bit of extra effort.
Checking For Mountain Obstacles
Get out of the truck and look up. Most people skip this step, but honestly, it’s the one that matters most in heavily forested campgrounds.
Older parks like Jasper’s Wapiti Campground or many Kananaskis sites have mature pines and spruce trees with low-hanging branches right over the pad. These branches will scrape your roof, snag your TV antenna, or even damage your RV awning if you don’t spot them first.
Walk the full length of where your trailer will sit. Check above and to both sides—look for dead branches that could fall in wind.
If a branch is going to interfere with your roofline or awning, pick a different position on the pad or ask the campground office about trimming options. Don’t just hope for the best.
Also check the ground. Look for large rocks, stumps, fire pit edges, or soft spots that could cause problems once you back in.
Rocky Mountain campground pads are rarely paved, and many have uneven gravel or packed dirt surfaces. It’s not exactly a luxury parking lot.
Slide-Out And Hookup Clearances
Once you’ve confirmed overhead clearance, check the sides. Measure with your eyes where your slide-outs will extend.
You need enough room on both sides for the slides to fully deploy without hitting a tree, picnic table, fire ring, or the power pedestal. Speaking of the pedestal, note its exact location.
You want your RV’s utility panel close enough for your power cord and sewer hose to reach. Most power cords are 25 to 30 feet long, and most sewer hoses are about 15 to 20 feet. If you back in too far or angle the trailer wrong, you’ll be short.
Position the trailer so the utility side faces the hookups, the slide-outs have full clearance, and you still have room for your outdoor kitchen, patio mat, and chairs. Then, have your spotter guide you into the final position before you set a single thing up.
Step 2: Levelling Side-To-Side Before Unhitching
This step is non-negotiable, and it has to happen while your trailer is still attached to the tow vehicle. Leveling side-to-side first is just easier, safer, and way more accurate when you can still use the truck to reposition the rig.
Reading The Level
Rockies campsites, especially in provincial parks throughout Kananaskis Country, are rarely flat. Most pads have some degree of side slope for drainage, and some have a noticeable tilt you can feel the moment you step inside.
Place a bubble level on the floor near the center of the trailer, or check your built-in level if your rig has one. Some RVers put a level on the hitch or coupler as a quick visual reference, but honestly, the floor reading is more reliable.
If the bubble is off-center, you need to raise the low side before you go any further. Don’t guess. Even a small side-to-side tilt makes doors swing open or closed on their own, throws off your RV refrigerator operation, and makes sleeping uncomfortable.
Using Levelling Blocks
Grab your levelling blocks or curved levelling ramps. Place these leveling blocks behind the tires on the low side of the trailer only.
You want to raise that side up to match the high side. Slowly pull forward and then back the low-side tires up onto the blocks.
Have your spotter watch the bubble level and signal you to stop when the trailer reads perfectly flat side-to-side. If you use stackable blocks, start with a conservative stack—it’s better to add one more than to overshoot and have to start over.
Once the bubble is centered, set your parking brake on the tow vehicle and get ready for the next step. An automatic leveling system handles this electronically on some rigs, but most travel trailers in the Rockies rely on manual blocks. Either way, side-to-side level always comes first.
Step 3: Chocking And Unhitching
With the trailer level side-to-side, it’s time to secure the rig and disconnect the tow vehicle. This is where safety jumps to the top of the list. Mountain sites have slopes you might not even notice until your trailer starts rolling.
Securing The Rig On A Slope
Place heavy-duty wheel chocks firmly against both sides of each tire, front and back. Don’t use small plastic wedges or rocks—use real, purpose-built wheel chocks rated for your trailer’s weight.
On a sloped Rockies campsite, gravity works against you. A trailer that rolls even a few inches after unhitching can shear a tongue jack, damage the hitch, or worse.
Chock every tire before you disconnect anything. This is not optional. It’s the single most important safety step in the entire setup process.
Give the trailer a firm push after chocking to make sure it doesn’t budge. If it moves at all, reposition the chocks or add leveling blocks underneath for a more secure bite.
Disconnecting The Tow Vehicle
With the chocks confirmed, you can begin the unhitching sequence. Follow this order every time:
- Unplug the 7-way electrical cable from the truck and stow it on the trailer tongue.
- Disconnect the breakaway cable from the tow vehicle.
- Unhook the safety chains from the hitch and drape them over the trailer tongue so they don’t drag on the ground.
- If you have a weight distribution hitch, remove the spring bars and stow them before lifting the coupler.
- Use the tongue jack to raise the coupler just high enough to clear the hitch ball.
- Open the coupler latch, then raise the tongue jack further until the coupler lifts completely off the ball.
- Slowly pull the tow vehicle forward and out of the way.
Once the truck is clear, raise the tongue jack a bit higher so the coupler is well above anything it could contact. Now you’re ready to level front-to-back.
Step 4: Levelling Front-To-Back And Stabilising The Trailer
With the tow vehicle out of the way, your trailer stands on its own. Now you fine-tune the front-to-back level and lock the rig in place so it doesn’t rock every time someone walks through the door.
Adjusting The Tongue Jack
Use your power tongue jack—or just the manual crank, if that’s what you’ve got handy—to raise or lower the front of the trailer. Keep an eye on your bubble level inside the rig. Seriously, even a tiny adjustment can make a surprising difference.
Getting the trailer perfectly level front-to-back isn’t just about being comfy (though, let’s be honest, that’s nice too). Your RV refrigerator needs to be level to run safely.
Most RV fridges use an absorption cooling system that depends on gravity to move coolant. If your trailer sits noticeably off-level, the coolant just won’t flow the way it should.
Let it run like that for too long and you’ll risk permanent damage to the cooling unit—one of the priciest parts in the whole rig. Level really does matter, maybe more than you think.
Once the bubble sits centered both side-to-side and front-to-back, pat yourself on the back. Leave the tongue jack right where it is. Don’t mess with it again unless you actually need to.
The Golden Rule Of Stabilizers
This warning needs to be loud and clear: never use stabilizer jacks to lift or level your RV. They’re just not built for that. Try it and you’ll probably end up bending, breaking, or even punching them right through their mounting brackets under the trailer’s weight.
Stabilizer jacks exist for one reason: to stop the trailer from rocking and swaying once it’s already level. They’re support, not structure. If you spot your stabilizers bowing or straining, you’ve got way too much weight on them.
Retract them and sort out the leveling with your tongue jack and leveling blocks instead. It’s just not worth the risk.
Proper Deployment
Lower each of the four corner stabilizer jacks until they touch the ground. If you’re on soft Rockies campground surfaces, toss a block under the stabilizing jacks to keep them from sinking. That trick helps keep everything steady on gravel or dirt.
Crank each jack down just until it’s snug against the ground or pad. You want firm contact—no lifting. When you step inside, the trailer should feel solid, not like a trampoline.
If you still feel it rocking, give the jacks a quarter turn tighter. But don’t go so tight that the tires start to leave the ground. That’s a bad sign.
Step 5: Hooking Up Utilities In The Right Order
With the trailer level and stable, you’re almost home. Connecting power, water, and sewer actually has a right order. Skip steps or rush and you might damage your rig or create a mess you’ll remember (and not in a good way).
Connecting Power Safely
Start by flipping off the breaker at the campground power pedestal. Seriously, don’t plug anything in with the breaker on.
Plug your surge protector into the pedestal outlet first. A quality surge protector checks for correct polarity, proper grounding, and safe voltage before your RV ever sees a spark. This step is a must at older Rockies campgrounds, where the wiring can be a bit… questionable.
Once the surge protector says the power’s good, plug your RV shore power cord into the surge protector. Only then flip the pedestal breaker back on. This order protects your rig’s electrical system, AC, and all those precious electronics from surges or bad wiring. Don’t skip it.
Inside, turn on your RV essentials one at a time. Fire up the air conditioner or furnace, then the water heater, and maybe crack open a roof vent for some airflow. No need to rush it all at once.
Connecting Water The Right Way
At the campground spigot, attach your water pressure regulator first. Some private RV resorts and even newer Rockies campgrounds have shockingly high water pressure that can wreck your RV’s plumbing, fittings, or water heater. The regulator brings it down to a safe level.
Next, hook up your inline water filter to the regulator if you use one. Then run your white, drinking-water-rated hose from the filter to the city water inlet on your trailer. Turn the spigot on slowly and check for leaks at every connection.
Connecting Sewer Without Rookie Mistakes
When you hook up sewer hose lines from the waste outlet to the campground connection, use a sewer hose support. That support keeps a gentle downward slope toward the dump point, so waste doesn’t just sit in the line. A loose hose on the ground will sag, collect waste, and eventually cause a headache you really don’t want.
Here’s the big rule: keep your black tank valve closed. Leave it shut until the tank is at least two-thirds full and you’re ready to dump. If you open it early, liquids drain out and solids stay behind, creating a stubborn buildup. The grey tank valve? Sure, open it for continuous shower and sink drainage, but that black valve stays closed until dump time.
Final Interior Checks Before You Relax
Before you kick back, do a quick walkthrough. If you use a few rv storage hacks during this phase, your living space will stay way more organized and functional:
- Check that the propane supply is on and your propane detector is actually working.
- Turn on the water heater (trust me, you’ll want hot water in about 20 minutes).
- Open roof vents or just flip on the fan for some fresh air.
- Make sure the fridge is running and getting cold.
- Now’s the time to extend your slide-outs, since you’ve already confirmed all clearances.
- Head outside, set up your RV awning, lay out your patio mat, and string up your patio lights. Once your outdoor kitchen and chairs are ready, you’re finally set to explore a bit—or just chill.
Your campsite setup checklist is done. When it’s time to break down camp, just reverse this sequence as your RV teardown checklist. Working backward from the last step to the first helps you avoid missing anything important. A dedicated rv departure checklist makes the transition back to the highway a whole lot smoother.
Frequently Asked Questions
What should a first-time RV owner do first when arriving at a campsite?
Walk the site on foot before you back in. Look for low-hanging branches, check where the hookups are, and make sure your slide-outs will clear everything. That two-minute walk prevents some of the most common (and expensive) mistakes at mountain campgrounds.
What items should be on a printable campsite set-up checklist?
A good printable RV checklist includes leveling blocks, wheel chocks, a surge protector, water pressure regulator, fresh water hose, sewer hose with support, bubble level, stabilizer jack pads, and your shore power cord. Toss in a few wooden blocks for soft ground and you’re set for most Rockies campsites.
Where can I find a free downloadable set-up checklist in PDF format?
Along The Rockies offers a downloadable Ultimate RVing Checklist that covers RV inspection, safety, and must-have accessories. Other RV travel sites also have free printable RV setup and teardown checklists in PDF format—laminate one and keep it in your tow vehicle. You’ll thank yourself.
How do I safely level an RV and connect to shore power, water, and sewer?
Level side-to-side first with leveling blocks under the low-side tires while you’re still hitched. Then unhitch, level front-to-back using the tongue jack, and deploy stabilizer jacks snug to the ground. For utilities, connect power with a surge protector first, attach a water pressure regulator before the hose, and keep your black tank valve closed until you’re ready to dump.
What is the 4-4-4 rule for RVing and how does it affect trip planning?
The 4-4-4 rule means driving no more than 400 kilometres a day, stopping by 4:00 p.m., and staying at least 4 nights at each destination. In the Rockies, this rule is especially helpful—mountain roads are slow, campground check-in times are strict, and arriving with daylight gives you time to set up without stress.
What should I inspect on a used RV before buying to avoid costly repairs?
Start by checking the roof and all the seams—look for water damage or any soft spots. You might miss something if you rush, so take your time here.
Crawl underneath and inspect the undercarriage. I always look for rust, frame cracks, or busted holding tanks; those can turn into expensive headaches fast.
Fire up every appliance: fridge, water heater, furnace, air conditioner—the works. Don’t just trust that they “look fine.”
Put the plumbing system under pressure and watch for leaks. Sometimes, a tiny drip hides in the weirdest places.
Examine the tires, brakes, and bearings closely. I’ve seen folks forget to check if the tongue jack and stabilizer jacks move smoothly—don’t make that mistake.