The Complete RV Maintenance Checklist for the Canadian Rockies
Mountain travel really punishes rigs that get neglected. A sticky brake caliper that doesn’t matter much on the prairies? Suddenly, it’s a real hazard when you’re dropping down a six-percent grade into the Icefields Parkway.
Cracked roof sealant that only leaks a bit in Ontario will let water pour in after a Rockies thunderstorm—especially if it freezes overnight. If you’re serious about travel trailer maintenance or motorhome maintenance through the Canadian Rockies, you need a routine that’s stricter, more frequent, and way more mountain-aware than any generic checklist offers.
We’re a family of five who tows through Banff, Jasper, Kananaskis, and Waterton pretty regularly, and honestly, we’ve learned a lot of these lessons the hard way. Frozen water lines after a September cold snap near Abraham Lake. A tire pressure scare on a tight stretch south of Jasper. Brake fade on a long descent—nobody in the truck wants to relive that.
Every item on this RV maintenance checklist is here because something actually went wrong on one of our trips. When you start incorporating these pre-trip RV maintenance steps, your rig stands a way better chance against the unique stresses of the mountains.
This guide covers pre-trip safety checks, a full seasonal service schedule tuned for Alberta and BC, and the most essential RV maintenance tips. We get into exterior care, plumbing systems, and a dead-simple way to track it all. Whether you’re staring at your first season with a travel trailer or you’re ten years deep into full-time RV life, the checklist below should help you keep your rig reliable in the mountains.
Looking for more Rockies-specific RV planning resources? Along The Rockies is built around exactly this type of practical, field-tested advice.
Key Takeaways
- Mountain grades, UV exposure, and early freezes demand a stricter RV maintenance schedule than you’d ever need for flat-terrain camping.
- Pre-trip brake, bearing, and tire checks aren’t optional before any Rockies route.
- A repeatable seasonal routine for winterizing, de-winterizing, and roof seal inspection saves you from the most expensive RV repairs.
The Reality Of RV Maintenance In The Mountains
The Canadian Rockies are tough on recreational vehicles. Steep passes, temperature swings of 30°C in a single day, and that intense high-altitude sun—these things all speed up wear in ways you might not expect.
A regular RV maintenance routine designed for easy weekend trips to flat prairie campgrounds just doesn’t cut it here. You need a different mindset.
Proper routine RV maintenance keeps you safe on these roads. When you stay on top of camper maintenance, your rig survives the climb and handles the descent, no drama. Following a good plan for seasonal RV maintenance helps you stay ahead of these challenges, making sure every system is ready for the high-altitude environment.
Why Mountain Travel Is Harder On Your Rig
Sustained steep grades? That’s the number one culprit. Passes like Sunwapta Pass (2,035 m), Vermilion Pass, and the climb out of the Crowsnest corridor put a ton of stress on trailer brakes, wheel bearings, transmission coolers, and tires.
Descending for 10 or 15 kilometres at a time generates heat that will quickly expose any deferred brake or bearing maintenance. You can’t fake it here.
UV intensity jumps about 10 to 12 percent for every 1,000 metres of elevation. Roof sealant, rubber seals, and tire sidewalls degrade way faster at Rockies elevations than they do at sea level. Then there’s the freeze-thaw cycling that can start as early as mid-September in the mountain parks. That’s how you end up with cracked caulking, split hoses, and burst fittings—long before a typical southern RV owner would expect trouble.
Road surfaces don’t help either. Plenty of Kananaskis and BC campground access roads are unpaved. Gravel throws rock chips at your undercarriage, rattles cabinetry loose, and coats slide-out seals with grit that just eats away at them over time.
How A Strict Service Routine Prevents Breakdowns
Comprehensive seasonal RV maintenance catches small problems before they turn into roadside emergencies. A bearing that feels rough during a spring repack? That’s a $40 fix in your driveway. Let it go, and you’re looking at a seized bearing on a descent, a tow bill, a damaged axle, and a ruined trip. Nobody wants that.
RV maintenance costs really balloon if you neglect things. Routine maintenance on a travel trailer might run $500 to $1,200 per year. But a single water-damage repair from a failed roof seal can cost anywhere from $3,000 to $8,000. RV repairs triggered by deferred maintenance almost always cost more than the maintenance you skipped. This checklist? It’s here to keep you out of that trap.
Pre-Trip Mountain Safety Checks
Every trip into the Rockies should start with a focused walk-around—brakes, tires, and towing connections. These three areas cause most of the serious roadside failures on mountain routes. The good news? None of them take more than 30 minutes to inspect if you do it right.
Trailer Brakes And Bearings
This is the single most critical mountain check. Before you pull onto the highway, manually test the brake controller by pressing the override slider at low speed in a parking lot. The trailer should pull back firmly and evenly. If it tugs to one side or the response feels weak, don’t head into the mountains until you’ve figured out what’s wrong.
Repack and grease wheel bearings at least once a year, or every 12,000 to 15,000 kilometres—whichever comes first. For Rockies travel, we actually recommend inspecting them before every major mountain trip. Jack up each wheel, spin it, and check for roughness or play. A wheel bearing service is pretty straightforward if you have a torque wrench and some fresh marine-grade grease. Not comfortable doing it yourself? Any RV or trailer shop in Calgary or Canmore can handle it quickly.
Catastrophic bearing failure on a steep descent is about as dangerous as it gets for a travel trailer. The wheel can lock, separate from the axle, or cause a loss of control. This is one maintenance item you really can’t put off.
Tire Inspection And Pressure
Check every tire for dry rot (those little cracks in the sidewall), uneven tread wear, and bulges. RV tires age faster than car tires because trailers sit for weeks between trips, and UV exposure at elevation just speeds up sidewall degradation. Replace any tire older than five to seven years, no matter how much tread is left.
Monitor your RV tire pressure when the tires are cold, before you drive anywhere. Use the pressure rating on the tire’s sidewall or the manufacturer’s spec for your loaded weight—not the vehicle placard pressure for an empty trailer. A good TPMS (tire pressure monitoring system) is honestly one of the best investments for mountain RV travel. You’ll get real-time alerts if a tire starts losing pressure.
Blowouts on narrow mountain parkways like the Icefields Parkway are extremely dangerous. There’s often no shoulder, nowhere safe to pull over, and traffic right behind you with limited sightlines. Proper cold inflation pressure and regular tire inspections are your best bet at prevention.
Hitch And Towing Connections
Walk through the hitch assembly methodically every single time you hook up:
- Safety chains: Cross them under the hitch coupler in an X pattern. Check each link for stretch or wear, and swap out any chain that shows visible damage.
- Breakaway cable: Attach it to the tow vehicle frame (not the hitch itself). Pull the pin and listen for the trailer brakes to engage. If they don’t, the breakaway system needs service before you leave.
- Weight distribution hitch: Lubricate the head and spring bars with white lithium grease. Check that the spring bar chains or brackets are properly tensioned.
- Sway control bars: Inspect the friction pads or cam mechanism for wear. Tighten or replace as needed. Sway control isn’t optional on windy Rockies highways like Highway 11 or the stretch between Canmore and Lake Louise.
Make sure all seven-pin electrical connections are clean and seated. Test running lights, brake lights, and turn signals with a helper watching from behind.
Seasonal Service Schedule For Rockies Camping
A solid RV maintenance schedule built around Rockies seasons keeps every system ready. Organizing specific RV maintenance tasks into a logical flow saves time and helps you avoid mechanical failures. Spring de-winterizing and monthly checks are the pillars of this routine.
The timing matters out here because the camping window is shorter. Prioritizing your monthly RV maintenance keeps your rig safe between longer trips. Meanwhile, thorough annual RV maintenance preps the vehicle for the brutal mountain winters.
Spring De-Winterizing
Once overnight temperatures stay reliably above freezing—usually late April to mid-May in the foothills, later at higher elevations—it’s time to flush the RV antifreeze and bring the water system back to life.
Flushing the antifreeze:
- Open all faucets, including the outdoor shower if you have one.
- Remove the water heater drain plug and open the pressure relief valve.
- Connect to a clean water supply and run fresh water through every line until all the pink antifreeze is gone. Usually, this takes 10 to 15 minutes per line.
- Close all faucets and the drain plug once the water runs clear.
Steps to sanitize fresh water tank systems:
- Figure out your tank size in litres. Use one-quarter cup of household bleach per 60 litres of tank capacity.
- Mix the bleach with water in a clean jug, then pour it into the fresh water tank.
- Fill the tank completely with fresh water.
- Run each faucet until you smell bleach, then close them.
- Let the solution sit for at least four hours—overnight is even better.
- Drain the entire system and refill with fresh water. Run all faucets until the bleach smell is gone. Sometimes you need to flush twice.
Don’t skip sanitizing. Stagnant water sitting in lines all winter breeds bacteria, and this 30-minute task protects your family’s health for the whole season.
Fall Winterizing For Alberta And BC
Winterizing in the Rockies? You’ve gotta start earlier than most people think. Overnight freezes in Kananaskis and the mountain parks can sneak up as early as mid-September.
Even in Calgary and the Cochrane foothills, hard freezes hit by mid-October more often than not. Don’t wait for November—it’s honestly too late by then.
Step-by-step winterizing process:
- Drain your fresh water, grey, and black tanks all the way. Don’t leave a drop behind if you can help it.
- Open up the water heater drain plug and hit the low-point drains too.
- Bypass the water heater with the bypass valve (usually a little lever behind the access panel). This saves you from wasting six to ten litres of pricey RV antifreeze in the heater tank.
- Grab an air compressor and set it to no more than 30 PSI. Blow out every line—open each faucet one at a time, hot then cold, and keep going until you don’t see any more water.
- Connect your winterizing kit (hand pump or valve from a jug) to the water pump intake. It’s not fancy, but it works.
- Pump non-toxic RV antifreeze through every faucet, the toilet, outdoor shower, and washing machine lines if you’ve got them. Run each until you get solid pink liquid—don’t rush it.
- Pour a cup of RV antifreeze down each drain to protect those P-traps. It’s quick insurance.
Burst pipes from missed lines are honestly one of the most common and expensive RV repairs in Alberta. Take your time here, and skip the shortcuts.
Monthly, Quarterly, And Annual Timing
Here’s a simplified schedule you can use as a baseline:
| Frequency | Key Tasks |
|---|---|
| Monthly rv maintenance | Tire pressure and condition, rv batteries and terminals, exterior lights, slide-out seals, safety detectors |
| Quarterly rv maintenance | Roof seal inspection, wheel bearing check, appliance operation test, propane leak test |
| Bi-annual rv maintenance | Generator service, awning deep clean, full plumbing inspection, electrical system check |
| Annual rv maintenance | Professional brake inspection, full roof reseal if needed, tire age evaluation, comprehensive safety inspection by a certified RV technician |
If you’re a full-time RVer or you do heavy mountain travel (over 8,000 km a season), bump those quarterly tasks to monthly and annual tasks to bi-annual. The mountains just chew through your systems faster, no way around it.
Exterior Protection Against Water, Sun, And Road Wear
Water intrusion kills more RVs long-term than anything else. Rockies UV, freeze-thaw cycles, and gravel roads just speed up exterior damage in ways most owners don’t expect.
Roof sealant, slide-out seals, and awning fabric all need regular attention if you want your rig to stay structurally sound. Ignore them and you’ll pay for it later.
Roof Seals And Caulking
Mountain UV at elevation just destroys lap sealant way faster than at lower altitudes. Add in those freezing nights and warm afternoons, and you’ll see cracks in a single season if your sealant’s already getting old.
Check the roof twice a year: once when you de-winterize in spring, and again in the fall before storage. Walk the whole roof (if it’s safe for your model) and look closely at every seam, vent, skylight, and antenna base.
Press the sealant with your thumb. If it cracks, lifts, or feels brittle, it’s time for some work.
Touch up any questionable spots with self-levelling lap sealant or a specialized RV sealant. Clean the area first, then lay down a good bead. Staying on top of this is honestly the cheapest way to dodge water damage that can cost thousands. It’s a 45-minute job, twice a year, and it’s worth every minute.
Don’t use silicone caulk on an RV roof unless your manufacturer tells you to. Silicone won’t bond with lap sealant and just causes more headaches later.
Slide-Outs And Awnings
Slide-out tracks pick up grit fast, especially after you camp on gravel pads in Kananaskis or the BC interior. Clean them with a stiff brush and hit them with a dry lube like 3-IN-ONE RV Care or a silicone spray. Wet lubricants just attract more dirt, so skip those.
Rubber weather seals on the slide-outs dry out and crack in mountain conditions. Treat them with a rubber conditioner (303 Aerospace Protectant is solid) at least twice per season. Stiff seals stick, tear, and let water in—nobody wants that.
For the awning, the rule’s simple: never roll it up wet and leave it. After a mountain rain, extend it, tilt it to drain, and let it dry before you put it away. Mold and mildew show up fast on damp fabric and are a pain to remove. If you have to stow it wet, unroll and dry it as soon as you can.
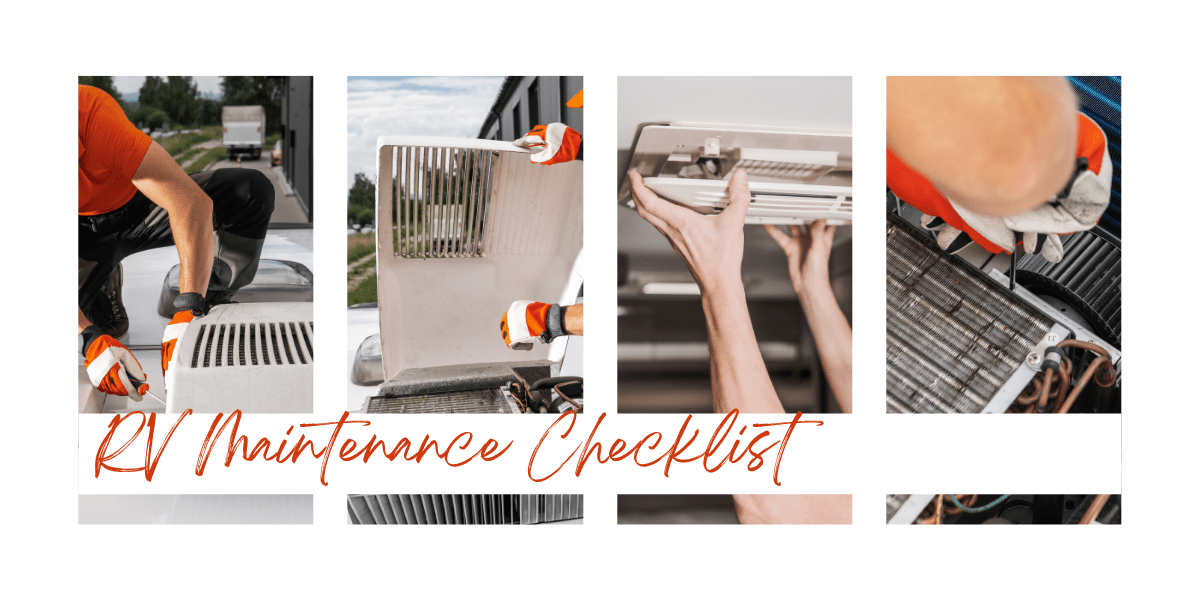
Don’t forget the air conditioner. Pop the shroud off and clear out pine needles, dust, and whatever else found its way in during your travels. Straighten any bent fins and make sure the drainage holes are open so water doesn’t back up into your cabin.
When To Book Professional Seal And Chassis Work
Some exterior jobs are just better left to a certified RV tech. Book a pro inspection if you spot:
- Soft spots or spongy areas on your roof
- Visible delamination on sidewall panels
- Water stains inside on ceilings or walls
- Cracked or rusted chassis parts
Most RV dealerships in central Alberta can handle a full exterior and chassis inspection. Book early in spring, because shops fill up fast once camping season hits.
Water, Waste, And Plumbing Care
The plumbing system takes a real beating during mountain RV travel. Temperature swings stress the fittings, campground water pressure jumps all over, and hot summer days can turn your waste tanks into a problem fast.
Keeping your fresh water clean and black tank clear saves you from trip-ruining issues and those expensive plumbing repairs nobody wants to deal with.
Fresh Water System Sanitizing
Besides the spring sanitize, do it again any time your trailer sits unused for more than two weeks during the season. Bacteria just love warm, standing water.
Between full sanitizations, here’s a simple trick: run water through every line for two or three minutes before you use them after a break. If your water smells or tastes weird, don’t mess around—run the full bleach process again. It takes less than an hour and barely costs anything.
Check all your supply lines under sinks and behind the toilet for drips or soft spots every month. A tiny leak behind a cabinet can cause water damage you won’t notice for a whole season.
The Black Tank Flush
Taking care of your black tank avoids two of the worst RV headaches: sensor failures and the dreaded “poop pyramid” (yeah, it’s a thing—solids build up when you leave the tank open and only liquids drain).
The golden rule: don’t leave the black tank valve open at a full-hookup site. Let the tank fill to at least two-thirds before dumping. The extra liquid helps flush everything out.
After dumping, use the built-in black tank flush valve (most newer trailers have one) or a flushing wand through the toilet. Run water until it comes out clear from the dump outlet. It takes five to ten minutes, but you’ll notice the difference in both sensor accuracy and odour.
Odour Control And Enzyme Treatments
Enzyme-based drop-ins (Happy Campers, Unique Camping + Marine, and similar brands) break down waste and paper way better than those old formaldehyde chemicals. Toss one in after each dump and add enough water to cover the tank bottom.
During hot valley trips, tanks heat up and odours get intense. Use enzyme treatments every time—seriously, it keeps the smell down and prevents the kind of buildup that clogs valves and leads to expensive service calls. A $15 bag of enzyme treatments lasts most of the season. Skip tank maintenance, and you could be looking at a $300 to $500 repair bill for stuck valves or bad sensors.
Power, Propane, And Safety Gear
Cold mountain nights drain batteries fast. Propane furnaces work overtime at elevation, and your safety equipment has to work perfectly when you’re camped miles from the nearest town. Don’t ignore these systems—they’re just as important as brakes and tires.
Battery Care And Charging Basics
Regular battery maintenance is key for reliable power. Healthy RV batteries mean your furnace won’t cut out on a cold night. For lead-acid batteries, check water levels in each cell every month during camping season—distilled water only. Top up just above the plates, not all the way to the brim. Scrub the terminals with a wire brush and use a thin coat of dielectric grease to keep corrosion away.
If your battery sits at 50 percent charge in freezing temps, it can freeze and crack inside. Cold mountain nights in places like Peter Lougheed or Wilcox Campground near the Columbia Icefield can drop well below zero, even in July. If your battery isn’t fully charged when it gets cold, it probably won’t last the night.
For off-season storage, hook up a trickle charger or battery maintainer. This is crucial—RV batteries don’t like deep discharge during long Canadian winters. A good smart charger keeps it topped up without overcharging. If you’re storing for more than a month, disconnect the battery from the trailer. And when you get to a campground, always check your shore power pedestal for stable voltage before plugging in.
Lithium batteries handle cold better, but you still need a charge controller that’s rated for low temps. Double-check your battery’s specs to be sure.
Propane System Checks
Before you set out on your first trip of the season, fire up the propane furnace and let it run for at least 15 minutes. Listen for steady ignition and consistent airflow—if the furnace keeps shutting off or refuses to light, get it serviced before you head for the mountains.
Overnight temps can dip to -5°C or colder up there, even in July, so you really don’t want to gamble with heat.
Check every propane connection for leaks using the old soapy water trick:
- Mix up some dish soap and water in a spray bottle.
- Spray it on every fitting, hose connection, and the regulator—don’t skip anything.
- Turn on the propane.
- Watch closely for bubbles. If you see any, you’ve got a leak that needs fixing before you use the system again.
Give the propane regulator a good look for cracks, corrosion, or even spider webs. (Honestly, insects love crawling into these things during storage.)
If you spot any damage, swap out the regulator right away—or, at the very least, every 10 years. Don’t push your luck with old gear.
Detectors And Emergency Equipment
Press the test button on your carbon monoxide detector and smoke detector to make sure they’re working. Replace their batteries at the start of each season, even if they seem fine.
Check the expiry dates printed on the detector bodies—most CO detectors only last five to seven years, which surprises a lot of people.
Take a look at your fire extinguisher. The gauge should be in the green, and the unit shouldn’t be expired.
Mount it somewhere you can grab it in seconds—not buried in an outside bin where you’ll never reach it in time. If you’re heading into the mountains, stash a second extinguisher in your tow vehicle just to be safe.
Keep a basic first aid kit, an emergency blanket, and a flashlight with fresh batteries in the trailer all year. Cell service drops out in lots of Rockies valleys, so you really have to rely on yourself sometimes.
Tracking Service And Building A Repeatable Routine
Honestly, the best RV maintenance checklist in the world won’t help if you can’t remember what you’ve done. Using dedicated RV checklists keeps your records straight and makes things a whole lot easier.
With a simple tracking system, you turn a pile of random tasks into a routine you can actually repeat. Keeping an updated RV maintenance log protects your rig—and frankly, your investment—year after year.
How To Keep An RV Maintenance Log
Write down every action in your RV maintenance log with four things: the date, the odometer, what you did, and what’s next. It doesn’t need to be fancy.
A little notebook tossed in the glovebox or tool drawer works just fine. That way, you don’t accidentally miss something important.
The log does three things for you. First, it reminds you when stuff’s due.
Second, it creates a record to back you up if you need a warranty claim. And third, it adds real resale value when you eventually sell or trade your rig.
Printable And Digital Tracking Options
If you like paper, grab a printable RV maintenance checklist split into monthly, quarterly, bi-annual, and annual jobs. Tack it inside a cabinet door for a quick look.
You can find plenty of free printable PDF checklists online, and most can be tweaked for your trailer model.
If you’re more of a digital person, set up a basic RV maintenance spreadsheet with tabs for each interval. Colour-code stuff—green for done, red for overdue—so you can see what’s what at a glance.
Some RVers use apps that send reminders, but honestly, a good spreadsheet does the trick and is easier to share with your partner or co-pilot.
Customizing The List To Your RV Type
Not every task fits every rig. If you own a travel trailer, you don’t need engine oil change reminders.
Motorhome folks don’t need a weight distribution hitch entry. Pick your RV type and trim the list down to just what matters.
Add model-specific stuff straight from your owner’s manual. Some trailers have weird slide-outs, unique roof materials, or tricky water heater bypasses that deserve their own line.
A checklist built for your actual rig beats a generic 80-item list any day—otherwise, you’ll just stop reading it after a couple of trips, which defeats the whole point.
Frequently Asked Questions
What regular maintenance should be done on an RV throughout the year?
Every month, check tire pressure, test battery terminals, look at exterior lights, and test your smoke and CO detectors. Every quarter, inspect the roof seals, check wheel bearings, and test all your propane connections.
Once a year, get the brakes inspected by a pro and check tire age and condition. It’s not just about tread—old tires can let you down, even if they look fine.
How often should I inspect and reseal the RV roof, seams, and windows?
Look over the roof and all exterior seals at least twice a year—once when you de-winterize in spring and again before you put it away for fall. The Rockies’ high-altitude sun and freeze-thaw cycles are brutal on sealant, so touching up lap sealant twice a year just makes sense.
What does the 4-4-4 rule mean for RV upkeep and storage?
The 4-4-4 rule says you should check on your stored RV every four weeks, run the engine or generator for at least four minutes, and drive or tow it four miles. This helps keep tires round, seals lubed, and the battery alive during long storage stretches.
What are the most common hidden costs of owning and maintaining an RV?
Roof and water damage repairs from ignored seals are the big one—they can run anywhere from $3,000 to $8,000, which stings. Many owners get caught by tire replacements based on age, not tread.
Batteries, propane servicing, and yearly brake work also sneak up on you. If you budget two to four percent of your RV’s value per year for maintenance, you’ll avoid most nasty surprises.
What should I check before buying a used RV to avoid costly repairs later?
Start with the roof. Press for soft spots, check for cracked sealant, and look for water stains on ceilings or walls inside.
Check tire age (find the DOT date code on the sidewall), test every appliance, run the water pump, flush the toilet, and peek under sinks for leaks. Ask for a maintenance log—if the seller shrugs, factor in the price of a professional pre-purchase inspection.
Where can I find a free, printable RV maintenance checklist in PDF format?
You can find a bunch of RV resource sites that offer free downloadable PDF checklists. Most of them organize the lists by monthly, quarterly, bi-annual, and annual tasks, which is honestly pretty handy.
Try to find one that lets you customize the list—nobody wants to waste time on stuff that doesn’t even apply to their RV, right? Along The Rockies also throws in a downloadable Ultimate RVing Checklist that covers inspection, safety, and the must-have accessories for mountain travel. It’s a solid starting point if you’re not sure what you need.